Photoshop Automation from Revit
Claude cuts a 3D view of your Revit model at the height you pick and exports it as masks: one colour for each kind of thing, the sun, the lines and the cut. Photoshop builds the picture from those masks, one named layer at a time, with a material on each floor.
Shown on the Pacific Continental Residence in Revit 2027
Revit × Claude is out: 44 Revit skills, three free to try. See the skills →
1. Connect Revit
The prompt runs through the Revit MCP server, a free add-in that lets Claude read the model you have open and make changes in it. Set it up once and it loads with Revit after that.
▸How to set up the Revit MCPopen
The full setup, with a video, is at archaiflow.com/setup.
step 1Install pyRevit
Install the latest pyRevit from pyrevitlabs.io.
step 2Add the extension, in Revit
It is in pyRevit’s own extension list, so there is nothing to download by hand.
- 1.Revit → pyRevit tab →
Extensions. Findrevit-mcp-pythonand install it. - 2.Same tab →
Settings→ Routes: turn the Routes Server on. - 3.Restart Revit and open a project.
step 3Install the Revit MCP
Paste this prompt to install the Revit MCP.
Connect the Revit MCP server to Claude Desktop on Windows.
The pyRevit extension is already installed at
%APPDATA%\pyRevit\Extensions\revit-mcp-python.extension

1. Install uv if it isn't already on PATH.
2. Add a "Revit Connector" entry to the mcpServers block of my
   claude_desktop_config.json that runs the main.py in that
   folder with uv. The repo README's "Connecting to Claude
   Desktop" section has the exact JSON shape:
   https://github.com/revit-mcp/revit-mcp-python
3. Tell me when it's done, and remind me to quit Claude Desktop
   completely and reopen it.
Quitting Claude Desktop completely and reopening it puts Revit Connector in the connectors list under the message box.
2. Connect Adobe
Adobe is a published connector, so there is nothing to install. In Claude, open the + menu under the message box, then Connectors → Add connector → Browse connectors, and connect Adobe.
▸Where to find itopen
3. One prompt
This prompt is for an axo cut from a Revit 3D view. Open the model in Revit and open Photoshop, then paste it into a new chat.
Use the Revit model I have open and Photoshop.

Read the 3D views and the rooms. Tell me what is in the
model, with a count for each: walls, floors, rooms by use,
doors, windows, furniture and planting.

Then ask me these one at a time, waiting each time:
1. which 3D view to use, and how high to cut it, 2-3
   options from what you found
2. which look, on one board of numbered cards with made-up
   example pictures, marking the one you would pick
3. which material for each kind of room, 2-3 options

Work on copies of that view, so mine stays as it is. Cut
the copies with a section box at the height I picked, and
export each with the same crop, lined up pixel for pixel,
to a folder in Documents: one colour for each category,
the sun and shadows on a white model, the lines, and the
faces the box cuts. Turn each colour into a mask.

Build the picture in Photoshop from those masks, one layer
at a time: the model in sun, a material on each floor by
room, the cut walls dark, glass and doors, then the lines
on top. Save it as a layered PSD and a PNG.

While you work:
- Give every category and its subcategories its own solid
  colour, with lines in the same colour, so each colour
  is one category.
- For the cut, make every surface white and every cut face
  solid red. What stays red is exactly what the box cuts.
- The API has no switch for shadows. Make a temporary view
  template from a view that has them on, controlling only
  shadows and lighting, apply it, then remove it.
- Draw each room's outline into the picture with the 3D
  view's own camera, so each material lands on its floor.

Never save the Revit model. Tell me what you made and where
the files are, and delete the view copies when I say I'm done.
Claude asks one question at a time and waits for each answer. After the last one, the rest runs on its own.
The four lines under “While you work” are what took longest to find out. With them, the masks line up and the cut is Revit’s own.
4. What comes back
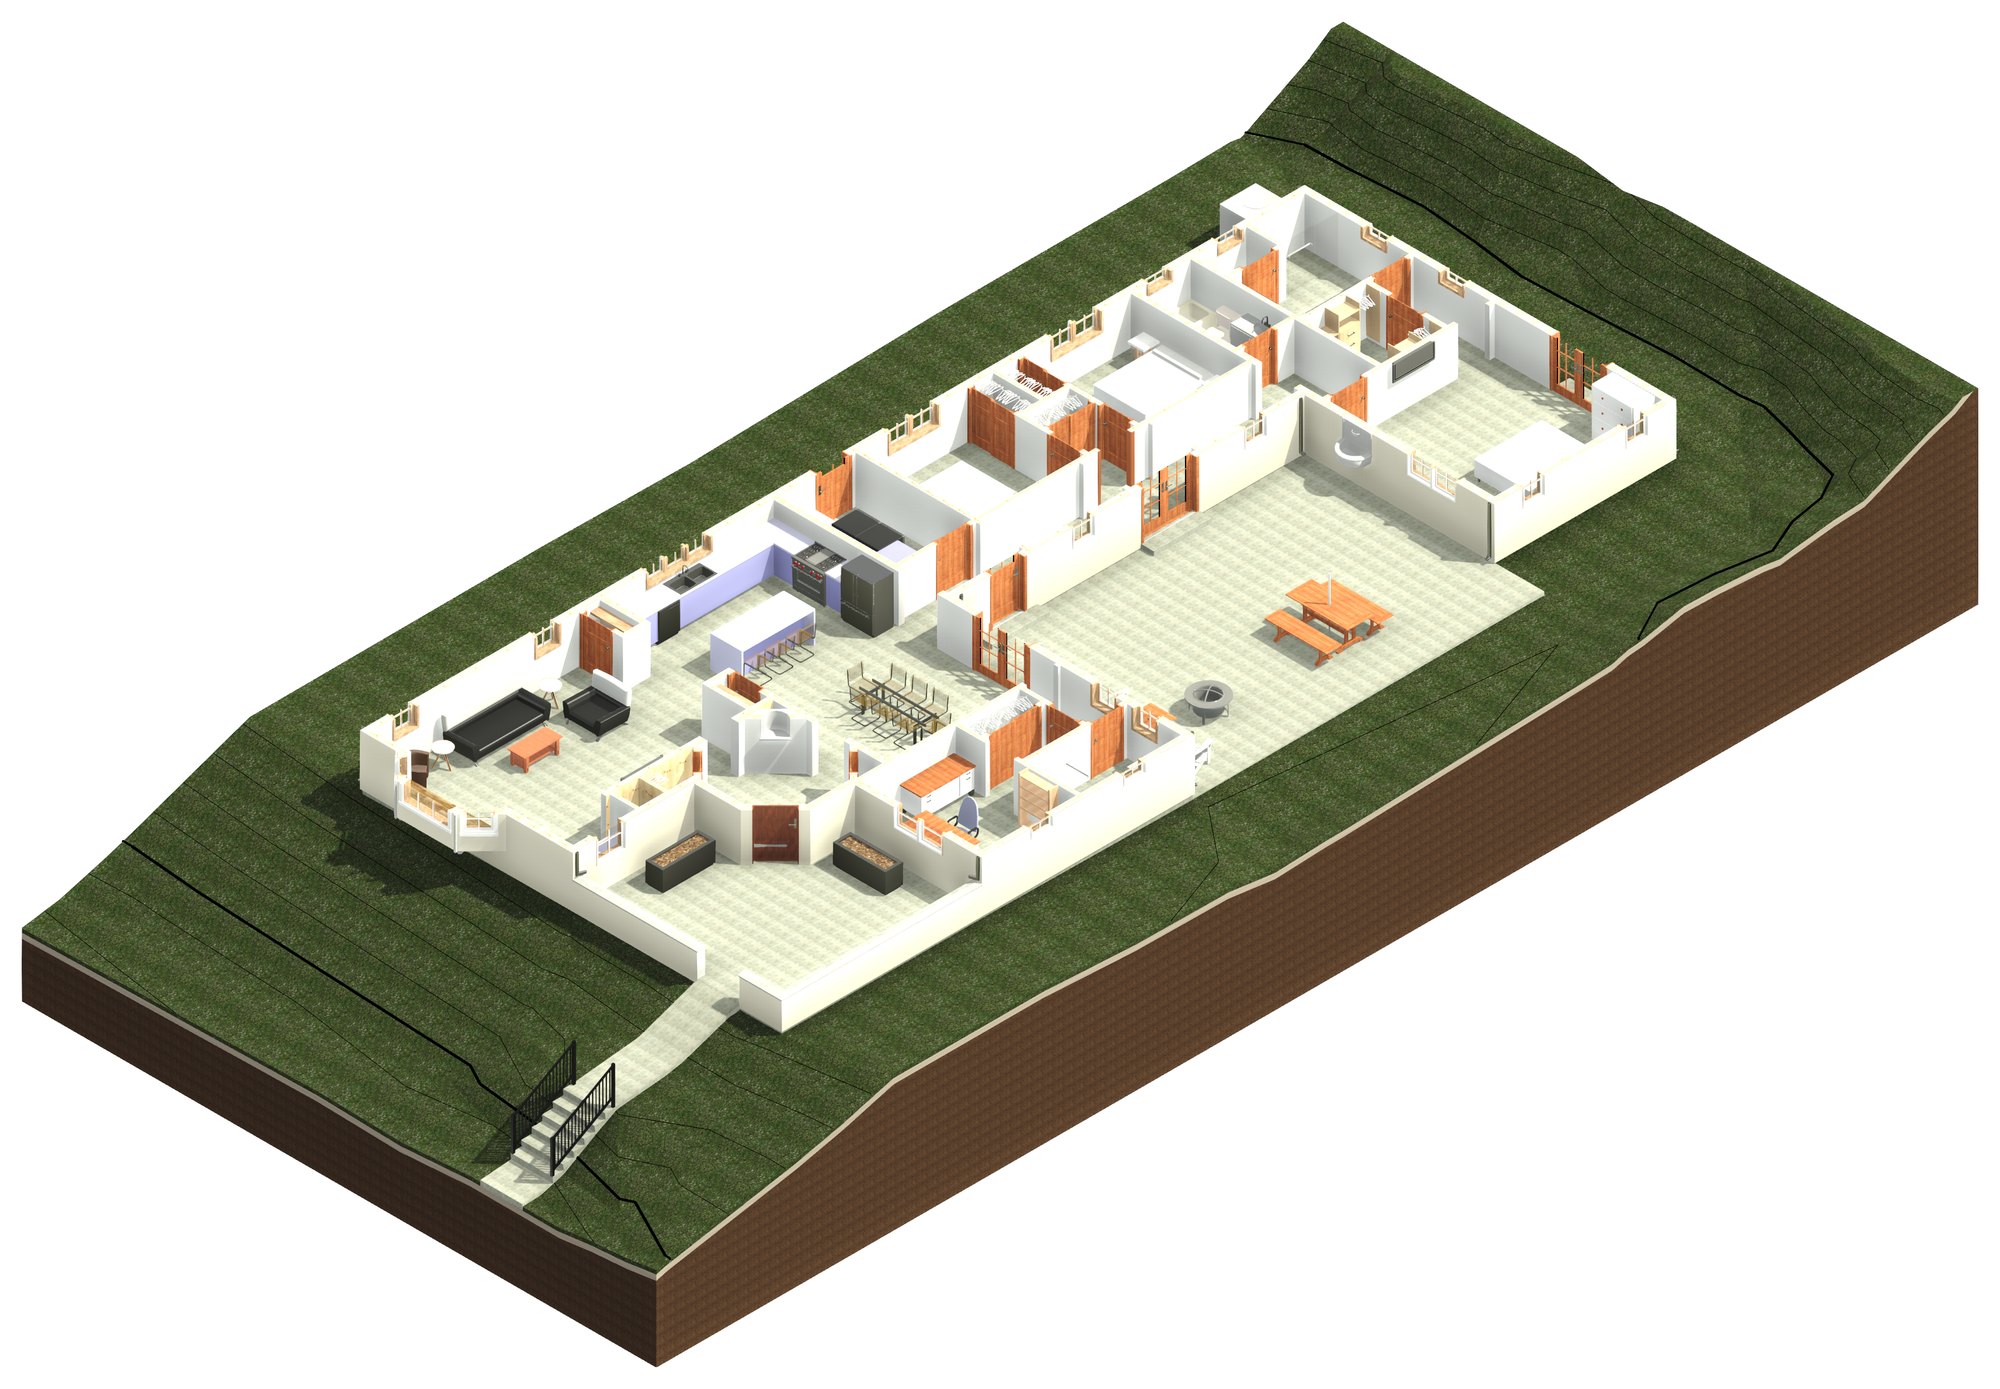
The view is a copy of a 3D view, cut by a section box at 4′-6″, so you look into every room from above.
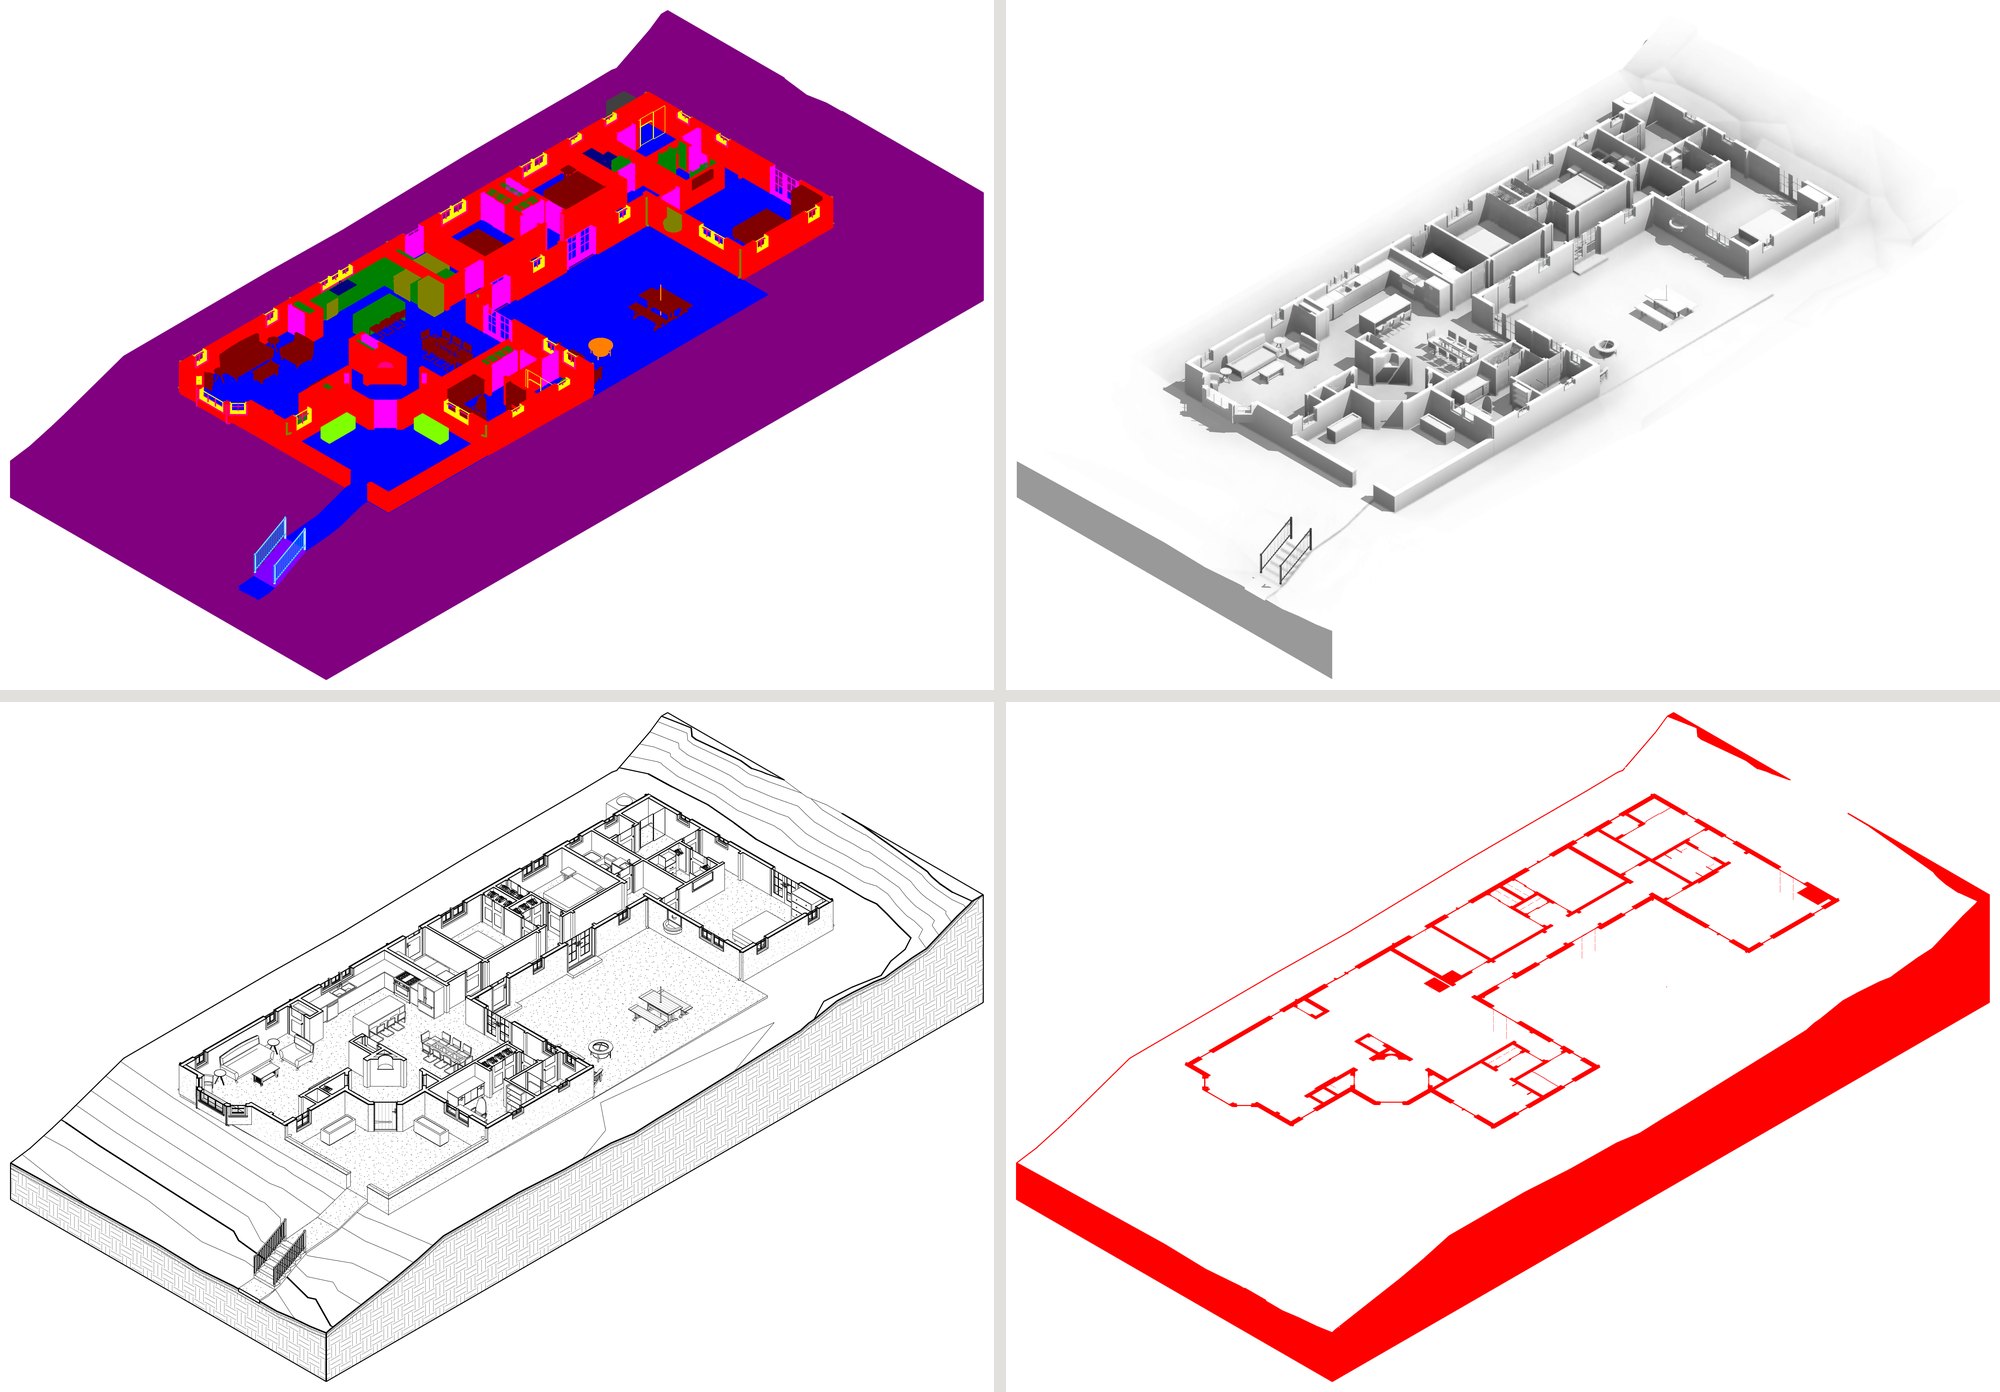
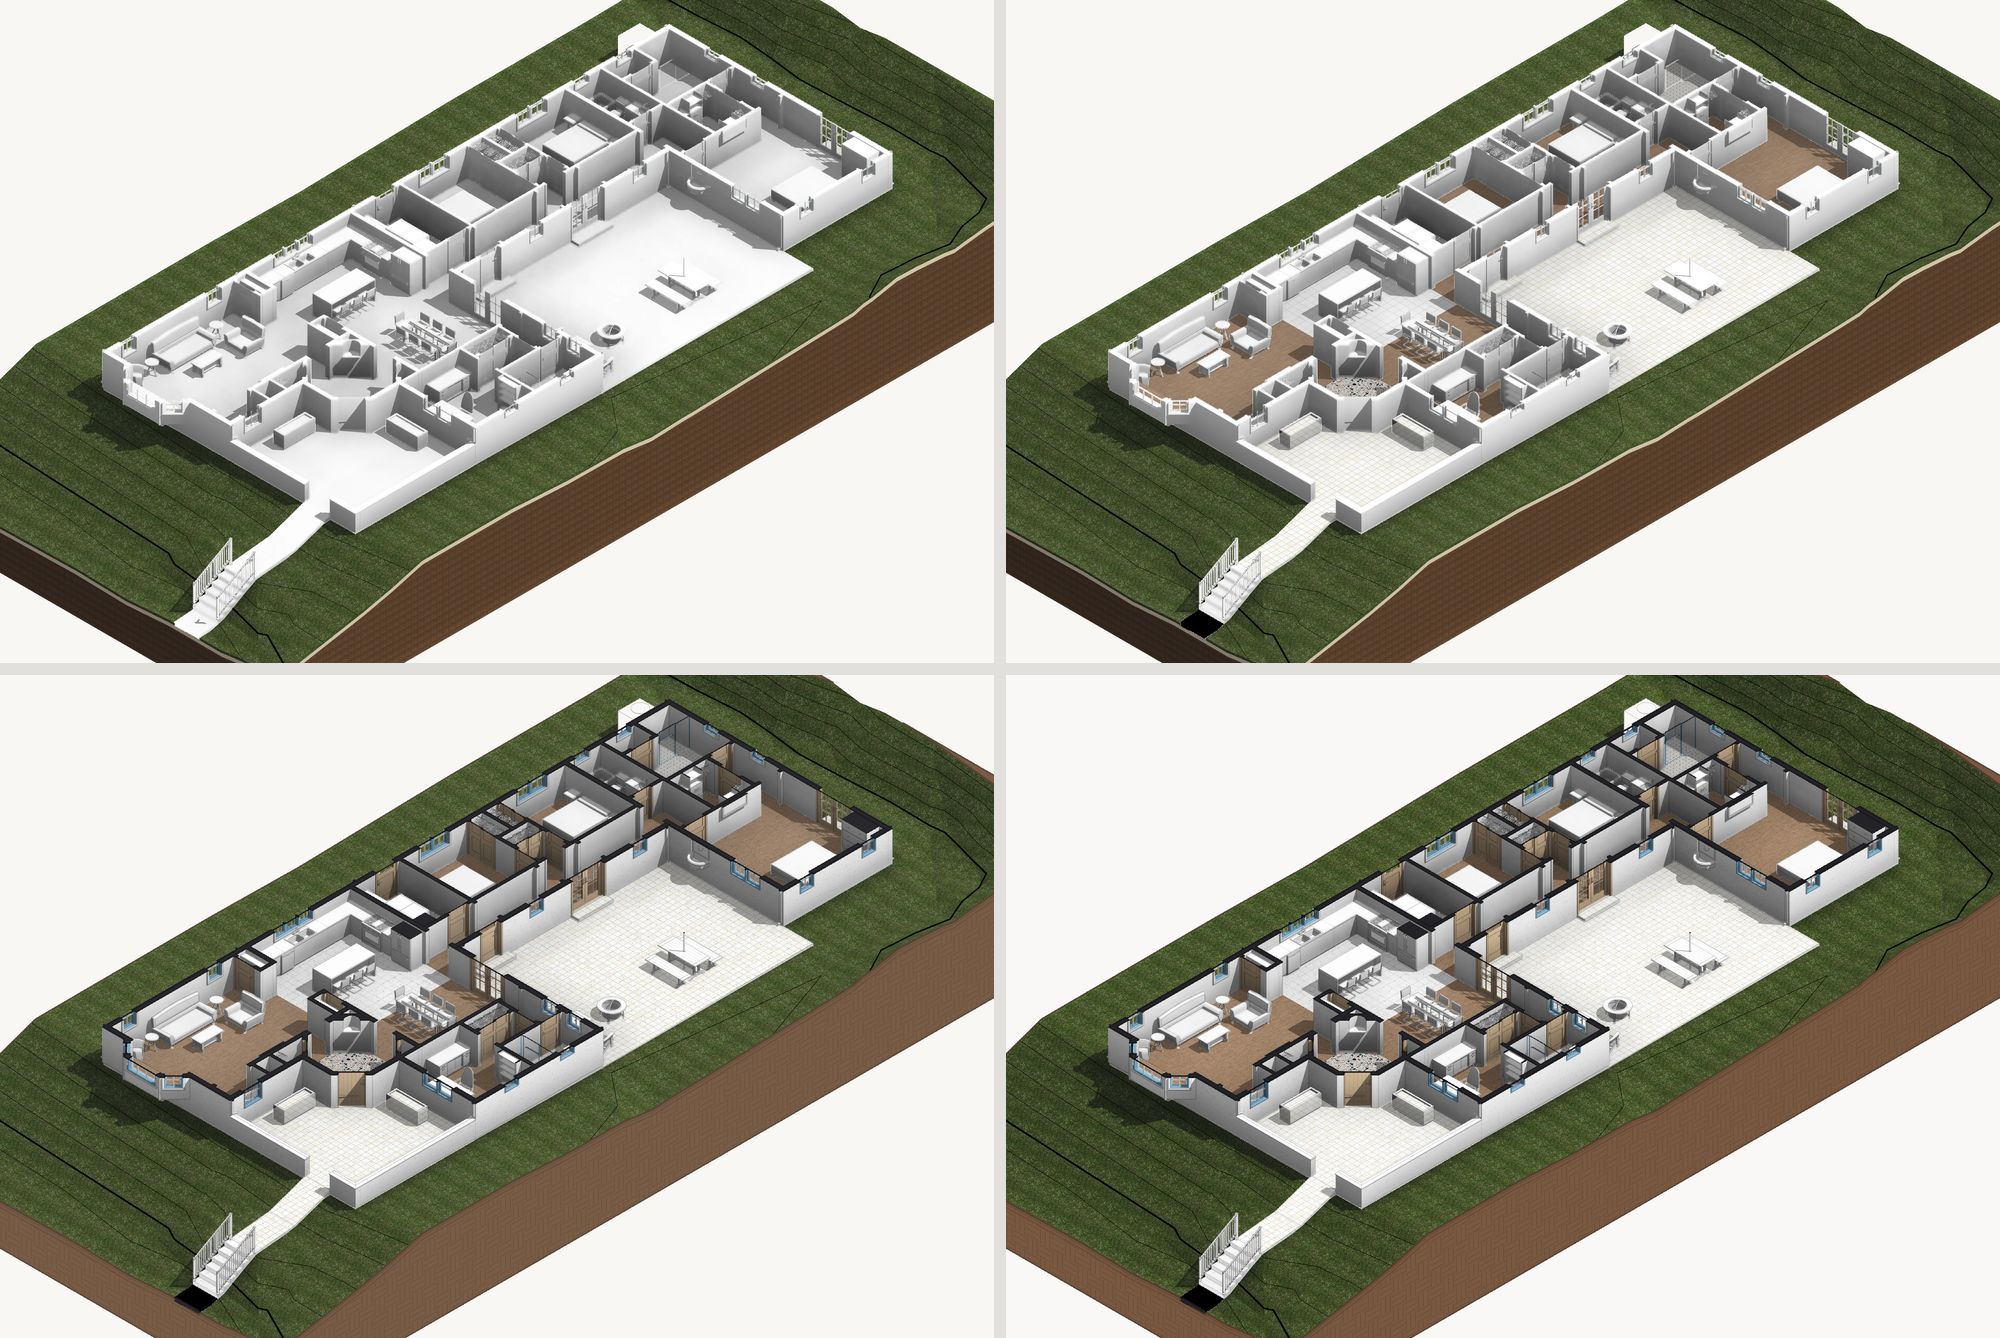
Then the same view four more times, with the same crop, so every pixel lines up.
Then Photoshop builds the picture from those masks. It comes back as a layered PSD and a PNG.
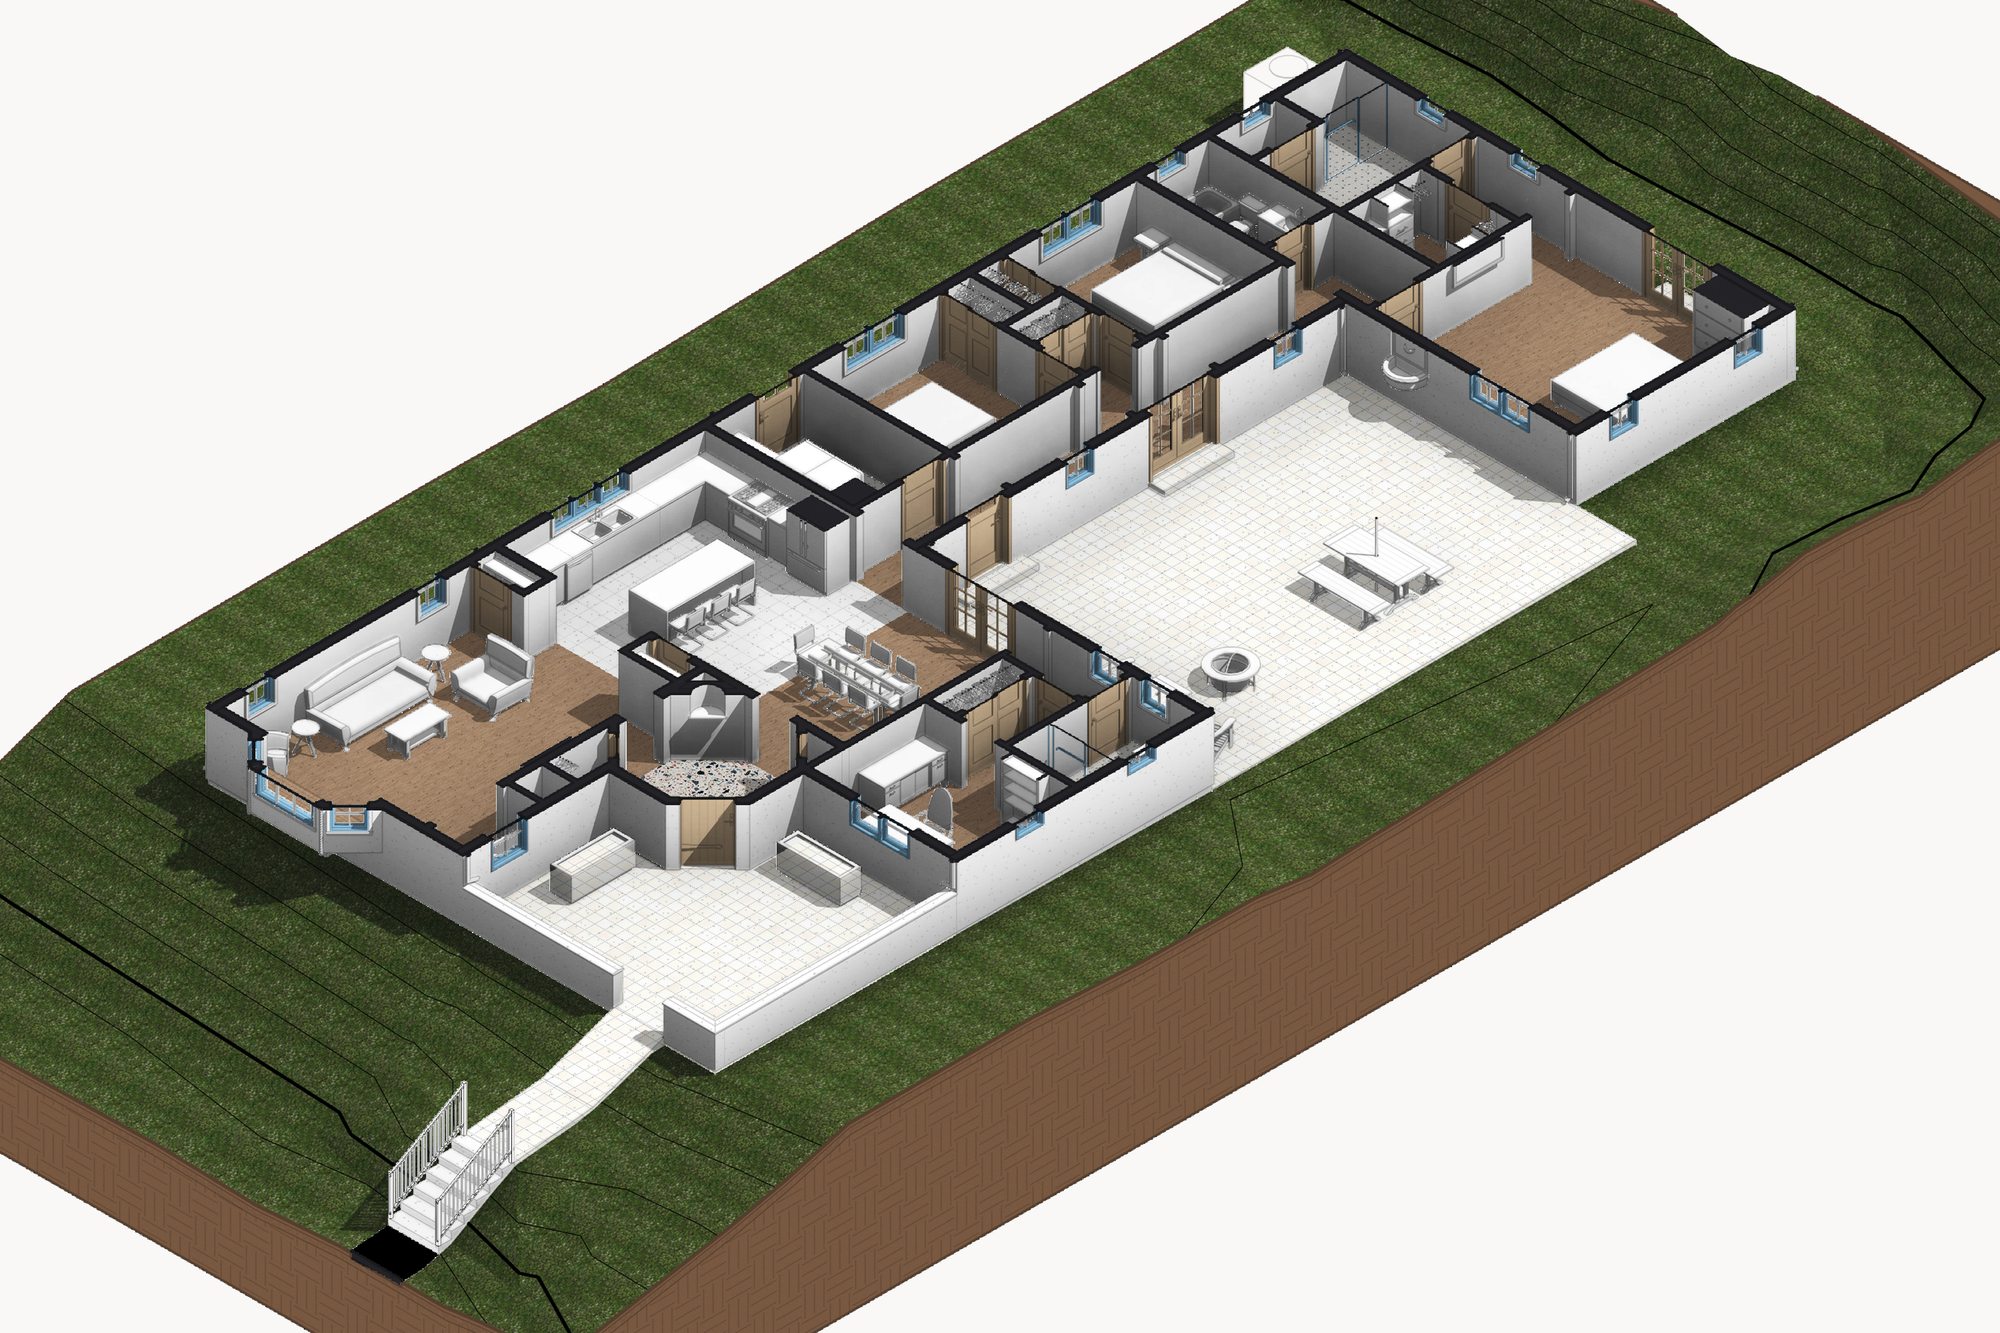
Every step is its own named layer with its Revit mask: the model in sun and the lawn, then a Floors group with oak, bath tile, kitchen porcelain, entry terrazzo and court pavers, then a Build group with the cut walls, the cut soil, glass, doors and the Revit lines, then a last pass on the tones.
The floor textures are free ones from ambientCG.
5. Why from the masks
Photoshop never guesses where a wall or a floor is. Every shape comes from a Revit mask, so walls, floors, doors and glass land where the model has them.
The dark wall tops are Revit’s own cut, so they sit exactly where the section box cuts the walls.
And because each part is its own layer with its own mask, you can change one material or one colour in Photoshop and leave the rest as it is.
I hope this one helped, even a little. If it did, the skills and the handbook will help a lot more: the Revit jobs that come back every day, done with Claude, in the model that is already open. Only what I have run myself and found useful on real projects goes in.
David