Every view in your Revit model, on one Miro board
It reads your model, asks which views you want and how to group them, then puts them all on one board.
Shown on racadvanced_2025 · Revit 2025 · Claude desktop app, with the Revit MCP server and the Miro connector
1. Connect Revit
The prompt runs through the Revit MCP server, a free add-in that lets an assistant read your open model. Set it up once and it loads with Revit from then on.
▸How to set up the Revit MCPopen
step 1Install pyRevit
Install the latest pyRevit from pyrevitlabs.io.
step 2Add the extension, in Revit
It is published in pyRevit’s own extension list, so there is nothing to download by hand.
- 1.Revit → pyRevit tab →
Extensions. Findrevit-mcp-pythonand install it. - 2.Same tab →
Settings→ Routes: turn the Routes Server on. - 3.Restart Revit and open a project.
step 3Install the Revit MCP
Paste this prompt to install the Revit MCP.
Connect the Revit MCP server to Claude Desktop on Windows.
The pyRevit extension is already installed at
%APPDATA%\pyRevit\Extensions\revit-mcp-python.extension

1. Install uv if it isn't already on PATH.
2. Add a "Revit Connector" entry to the mcpServers block of my
   claude_desktop_config.json that runs the main.py in that
   folder with uv. The repo README's "Connecting to Claude
   Desktop" section has the exact JSON shape:
   https://github.com/revit-mcp/revit-mcp-python
3. Tell me when it's done, and remind me to quit Claude Desktop
   completely and reopen it.
Quit Claude Desktop completely, reopen it, and Revit Connector is in the connectors list under the message box.
2. Connect Miro
Miro is a published connector, so there is nothing to install. In the Claude desktop app, open the + menu under the message box, go to Connectors, find Miro and sign in. Revit and Miro both need to be switched on in that menu.
3. One prompt
Open your model in Revit, open a new chat in the Claude desktop app, and paste this in.
Look at the Revit model I have open and tell me what's in
it: how many sheets, and how many views of each type. Use
Revit's own view types and list every one you find, not just
plans, elevations, sections and 3D. Count schedules
separately: they are tables, not geometry, and export blank.

Then stop and ask me, one at a time, waiting for my answer
each time:
1. which of those I want on the board
2. how to group them, with 2-3 concrete options to pick from
3. how big the images should be, and what the export can
   actually give you
4. whether to start with a sample of 3, or do the full set

Then export each view straight from the model as a PNG. Take
the view as it is set up: if one comes out dark or clipped,
leave it and tell me at the end rather than changing it.

Then build a Miro board named after the model: one frame per
group, the images in a row inside each frame, a caption under
every image with its view name and type, and a title block at
the top with the model name, the date, and what was left off.
Order plans ground-up by level elevation, not alphabetically.

Read and export only: do not change, save, or sync the model.
Tell me the tool call count before you start and wait for my
go-ahead. If a view fails, skip it and note it at the end.
4. What comes back
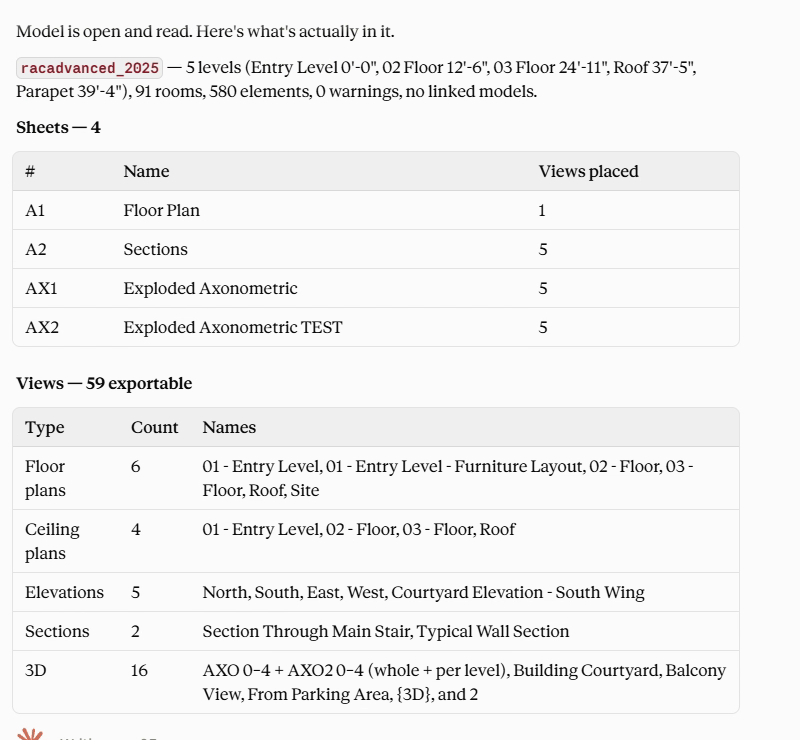
First an inventory, before anything is exported. The drawing set counted, named and checked for warnings, in about half a minute.
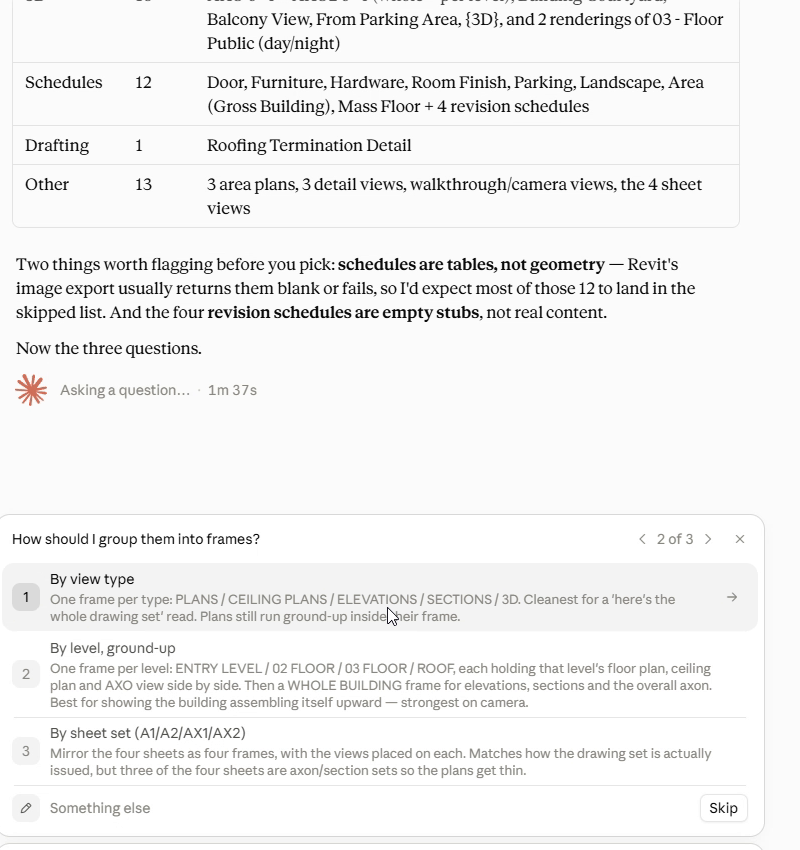
Then the questions. The second one is where the board gets its shape, so it comes back as options to pick from.
Then the board: forty-five views in ten frames, each captioned with its view name and type, plans running ground-up.
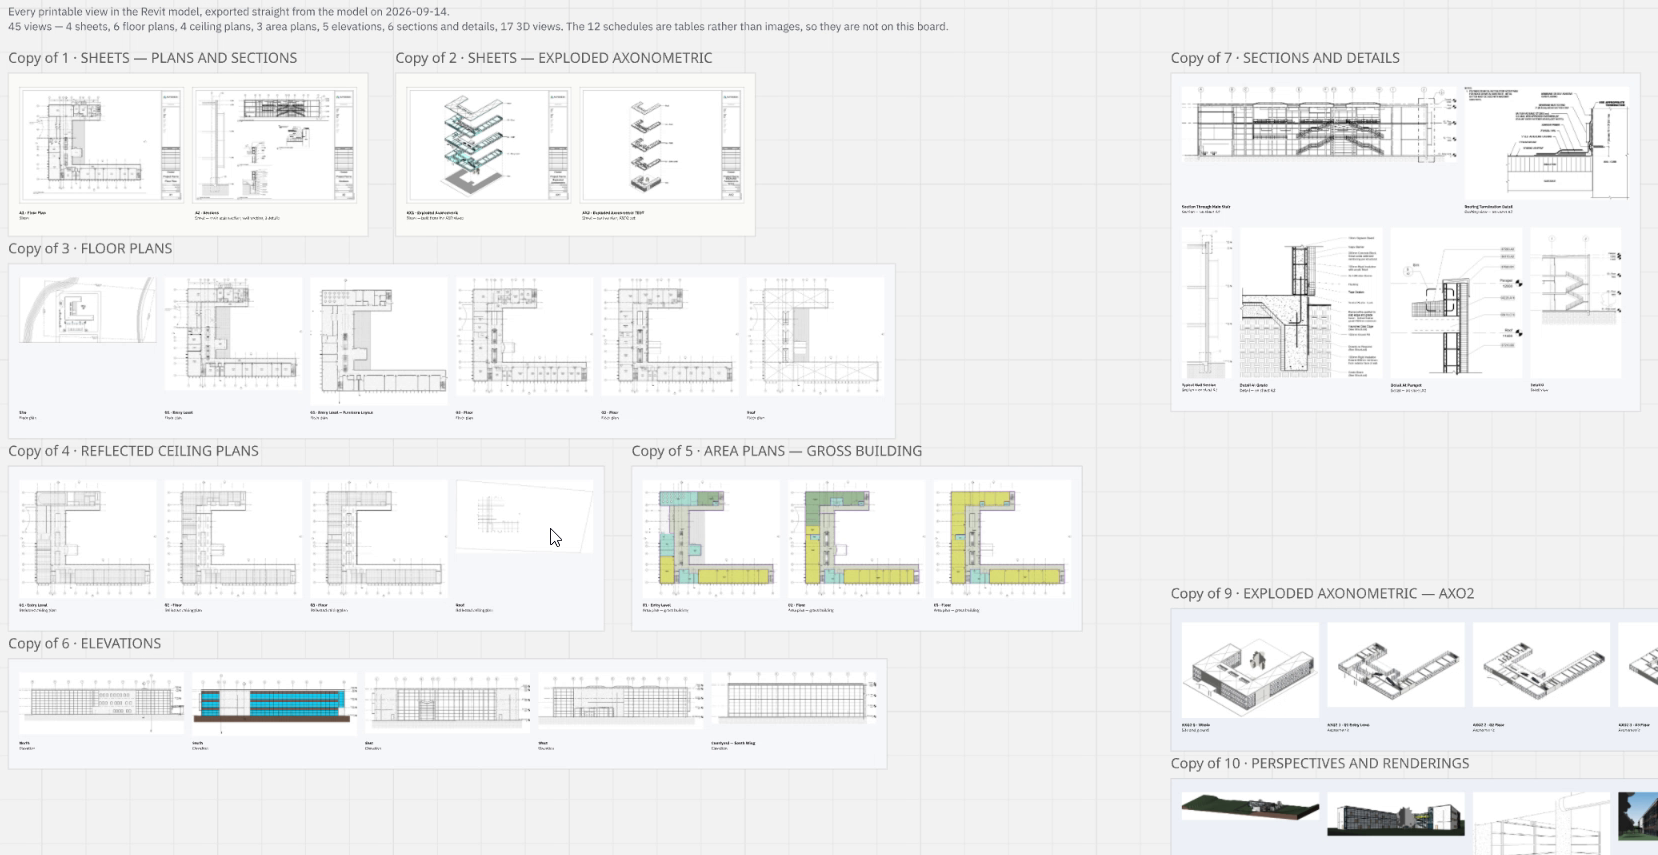
The board is a snapshot rather than a link: change the model and it keeps the old drawings until you run the prompt again.
5. Where this goes
Like this Revit and Miro example, there are hours in a week that AI can take back, and I think most of them have not been found yet.
How far AI gets in an architecture office depends on how the work it already does by hand gets mapped onto it. My guess is that it ends up leaving more time for design than for the manual work around it.