Revit to Home Tour
Claude picks the best views from your Revit model, makes a section cut video right inside Revit, and suggests a few website looks. You pick one, Higgsfield turns the views into photos and videos, and the sales page is built around them.
Shown on the Snowdon Towers sample in Revit 2027 · Claude Code, with the Revit MCP and Higgsfield
Revit × Claude is out: 44 Revit skills, three free to try. See the skills →
1. Connect Revit
The prompt runs through the Revit MCP server, a free add-in that lets Claude read the model you have open and make changes in it. Set it up once and it loads with Revit after that.
▸How to set up the Revit MCPopen
The full setup, with a video, is at archaiflow.com/setup.
step 1Install pyRevit
Install the latest pyRevit from pyrevitlabs.io.
step 2Add the extension, in Revit
It is in pyRevit’s own extension list, so there is nothing to download by hand.
- 1.Revit → pyRevit tab →
Extensions. Findrevit-mcp-pythonand install it. - 2.Same tab →
Settings→ Routes: turn the Routes Server on. - 3.Restart Revit and open a project.
step 3Install the Revit MCP
Paste this prompt to install the Revit MCP.
Connect the Revit MCP server to Claude Desktop on Windows.
The pyRevit extension is already installed at
%APPDATA%\pyRevit\Extensions\revit-mcp-python.extension

1. Install uv if it isn't already on PATH.
2. Add a "Revit Connector" entry to the mcpServers block of my
   claude_desktop_config.json that runs the main.py in that
   folder with uv. The repo README's "Connecting to Claude
   Desktop" section has the exact JSON shape:
   https://github.com/revit-mcp/revit-mcp-python
3. Tell me when it's done, and remind me to quit Claude Desktop
   completely and reopen it.
Quitting Claude Desktop completely and reopening it puts Revit Connector in the connectors list under the message box.
2. Connect Higgsfield
Higgsfield turns the Revit view into a photo or a video, with every piece where Claude placed it. It is added as a custom connector, so there is nothing to install.
Get started with Higgsfield- 1.In Claude Desktop, open Settings → Connectors → Add custom connector.
- 2.Name it
Higgsfieldand pastehttps://mcp.higgsfield.ai/mcp. - 3.Click Connect and sign in to your Higgsfield account.
Then open the + menu under the message box and switch on both Revit and Higgsfield. Images and videos use your Higgsfield credits, and Claude shows the cost before each one.
A connector added here also shows up in Claude Code when you sign in with the same account.
3. One prompt
Open the model in Revit, then paste this into Claude Code. Photos and videos use your Higgsfield credits.
Use the Revit model I have open.

Read it first: the levels, the homes on each level with
number, type and area, and every 3D camera view. Tell me
what you found, with a count for each.

Then ask me these one at a time, waiting each time:
1. which views sell the building best, 2-3 options from
   the cameras you found
2. which look for the website, 2-3 options shown as
   picture cards

Work on copies, so the original stays as it is. Make a
section cut video from the aerial view that moves down
one floor at a time, from the roof to the lowest floor
with homes.

Turn the picked views and the cuts into photos and short
videos with Higgsfield. Keep the camera and the building
exactly as they are in the model.

Build one sales page in the look I picked: the aerial
photo where each floor lights up when you point at it,
the homes on each floor with their plans, the section
cut, the rooftop and the street. Every number comes from
the model. Make it an artifact I can share with a link.

Never save the Revit model. Tell me what you did and how
to undo it.
Claude stops twice, so you can pick the views and the look. The rest runs on its own.
The model is never saved. The section cut is made on a copy of the view, and the copy can be deleted when you are done.
4. What comes back
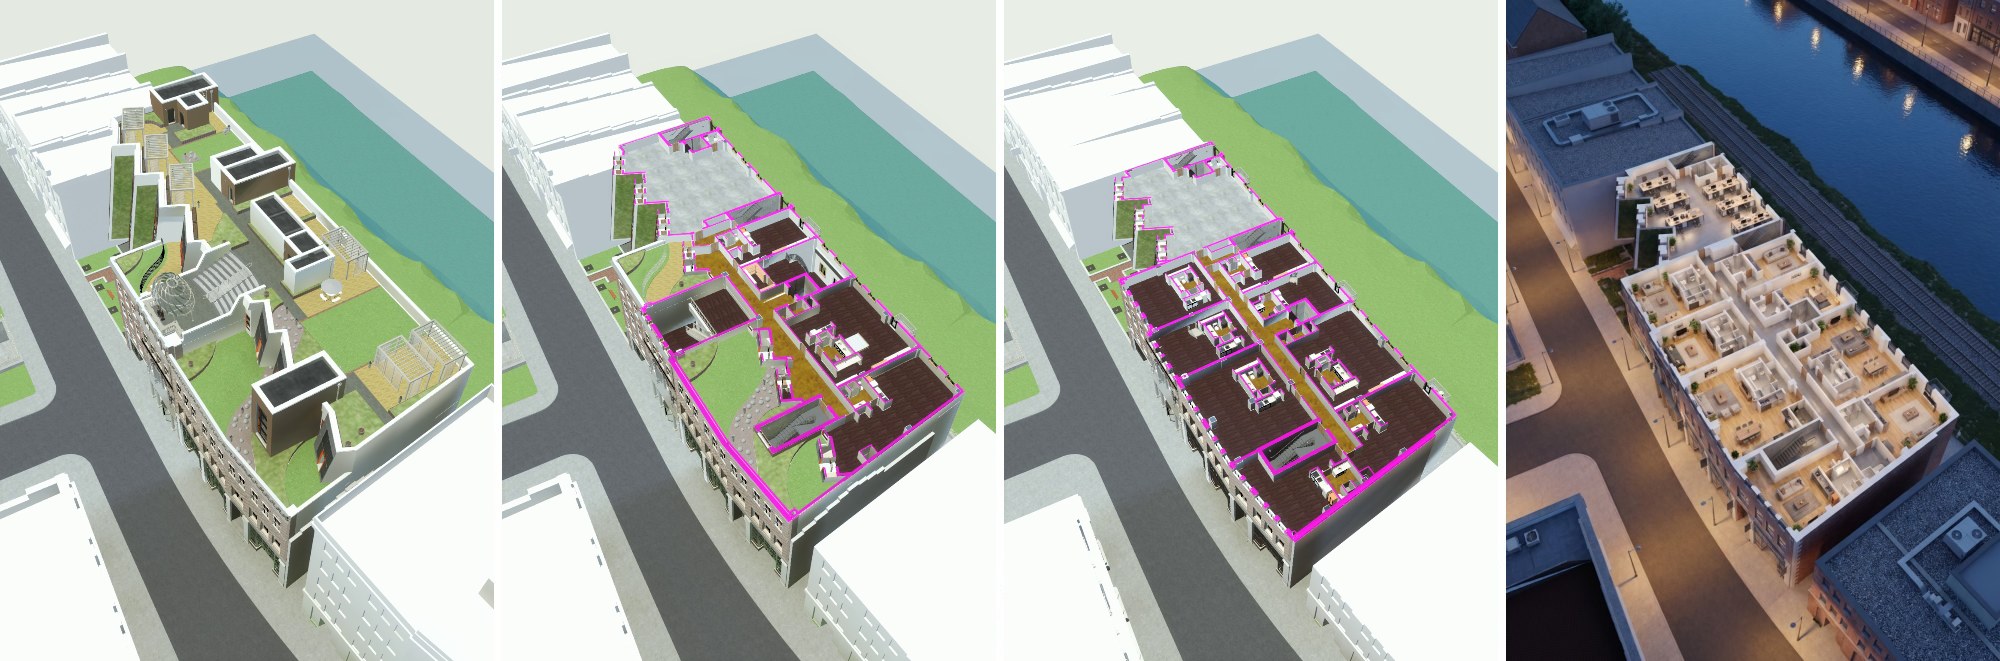
First, the section cut, made in Revit on a copy of the aerial view, moving down one floor at a time. On the page it ends on the floor plan.
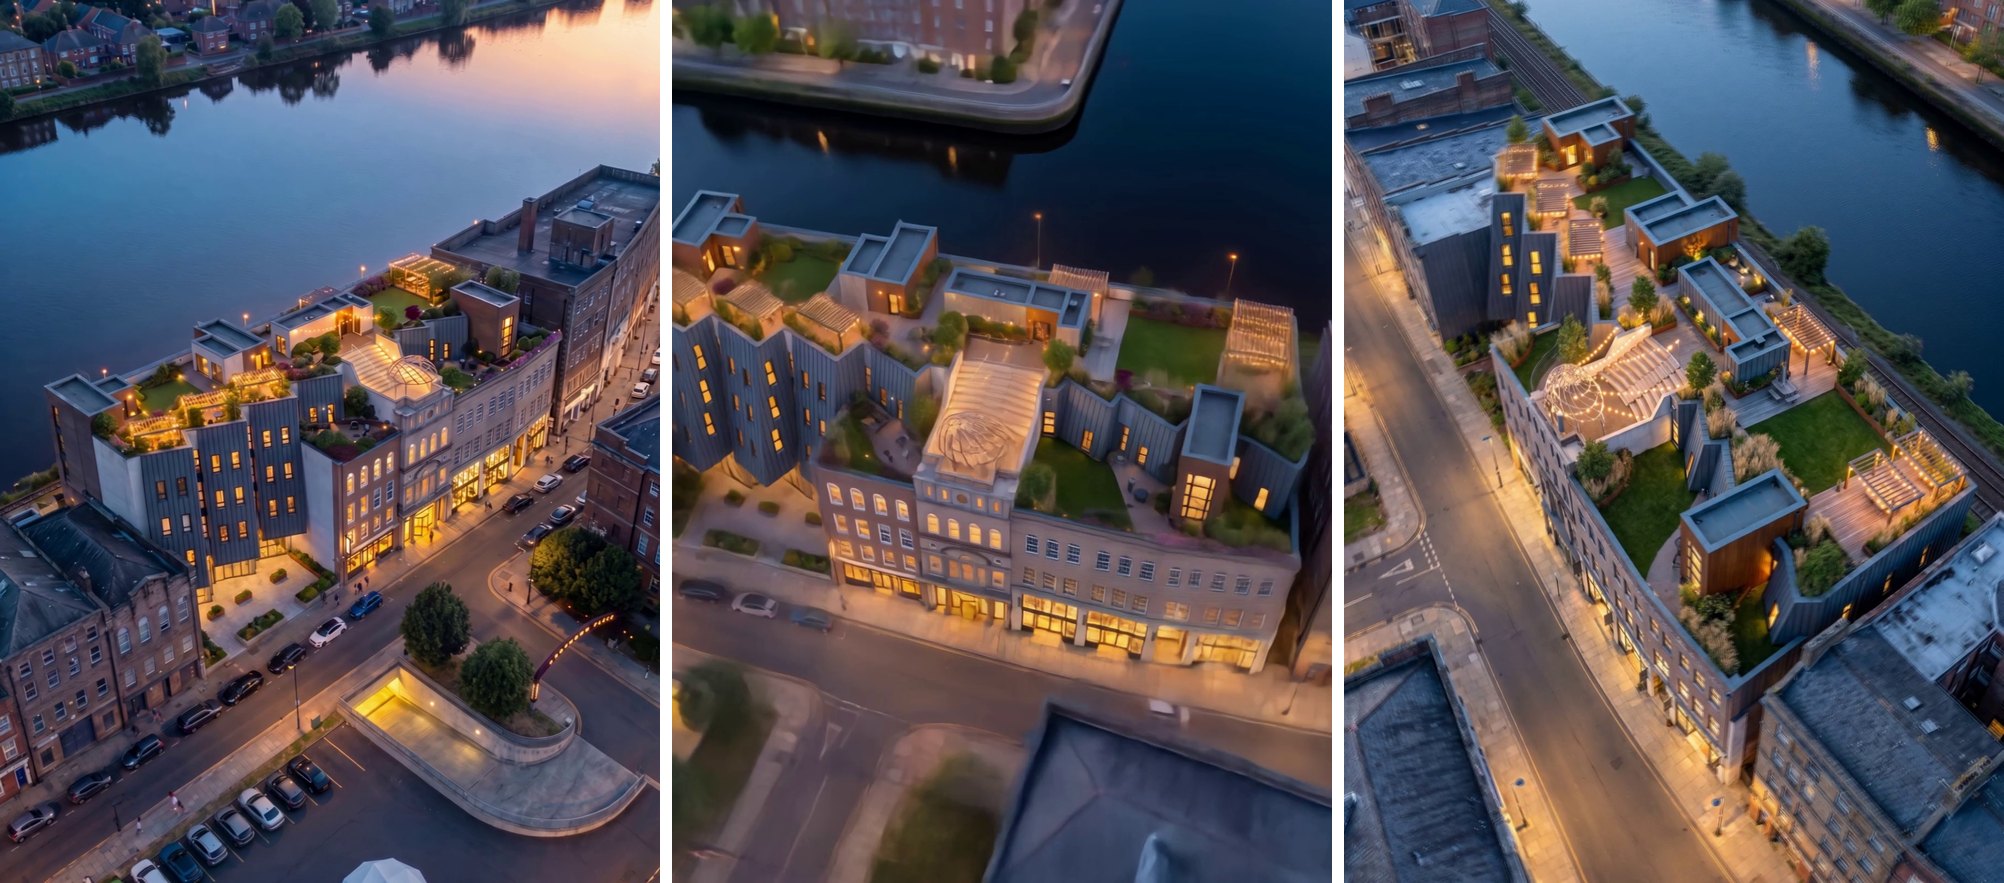
After you pick a look, Higgsfield turns the views and the cuts into photos and short videos, with the camera and the building where they are.
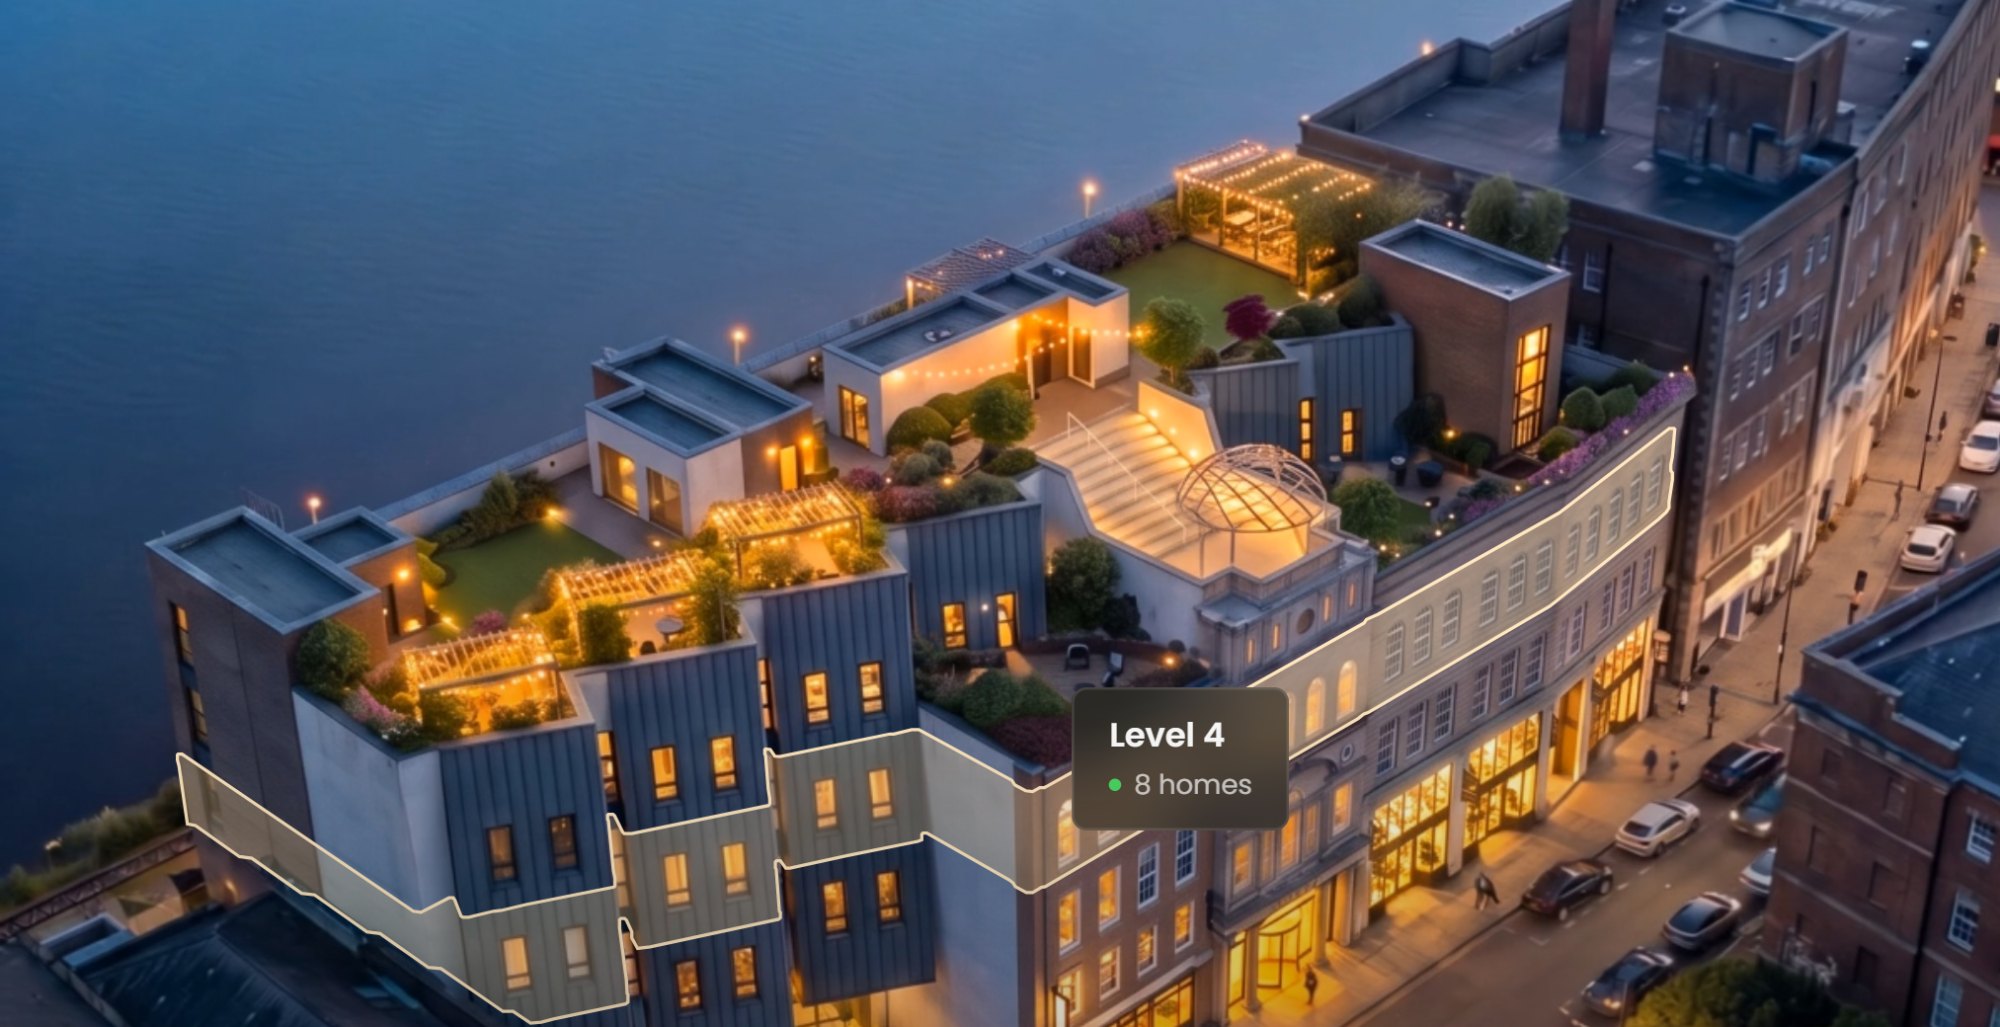
Then one web page, built around the aerial photo.
Hover a floor on the photo and it lights up, with the number of homes on it. Click it to see the homes on that floor.
Each floor has a list of its homes with the number, floor, area, and type, all read from the model. Pick one and the building cuts down to that floor’s plan, with a pin on every home. One home opens to a photo of the inside.
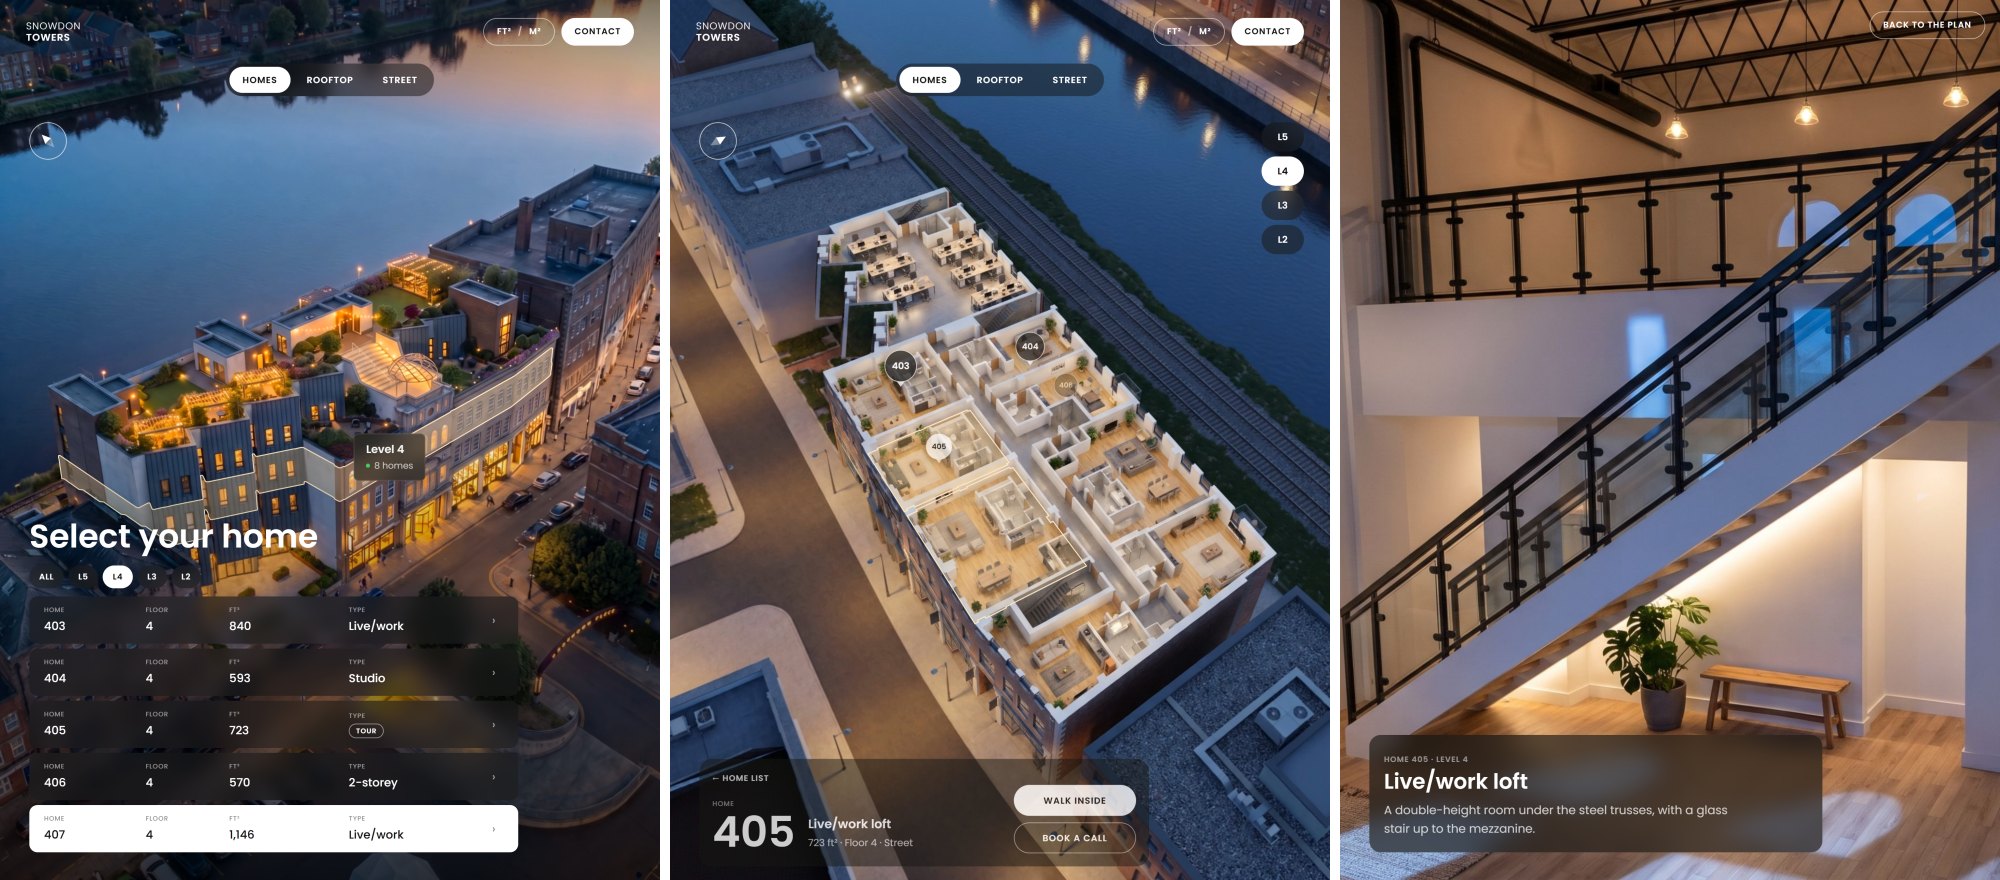
Between the photo and the plan, the cuts play from the roof down to the floor you picked.
Areas switch between square feet and square metres from the top bar.
5. Why the building stays right
Claude is not guessing the building. The views, the cut, and every home number and area come from the Revit model, and Higgsfield is asked to change only the light, materials, planting, and people.
The outline you hover is not drawn by hand. Claude renders a second picture from the same camera as the aerial view, with each floor in one flat colour by its height, then traces each colour into an outline and lays it on the photo.
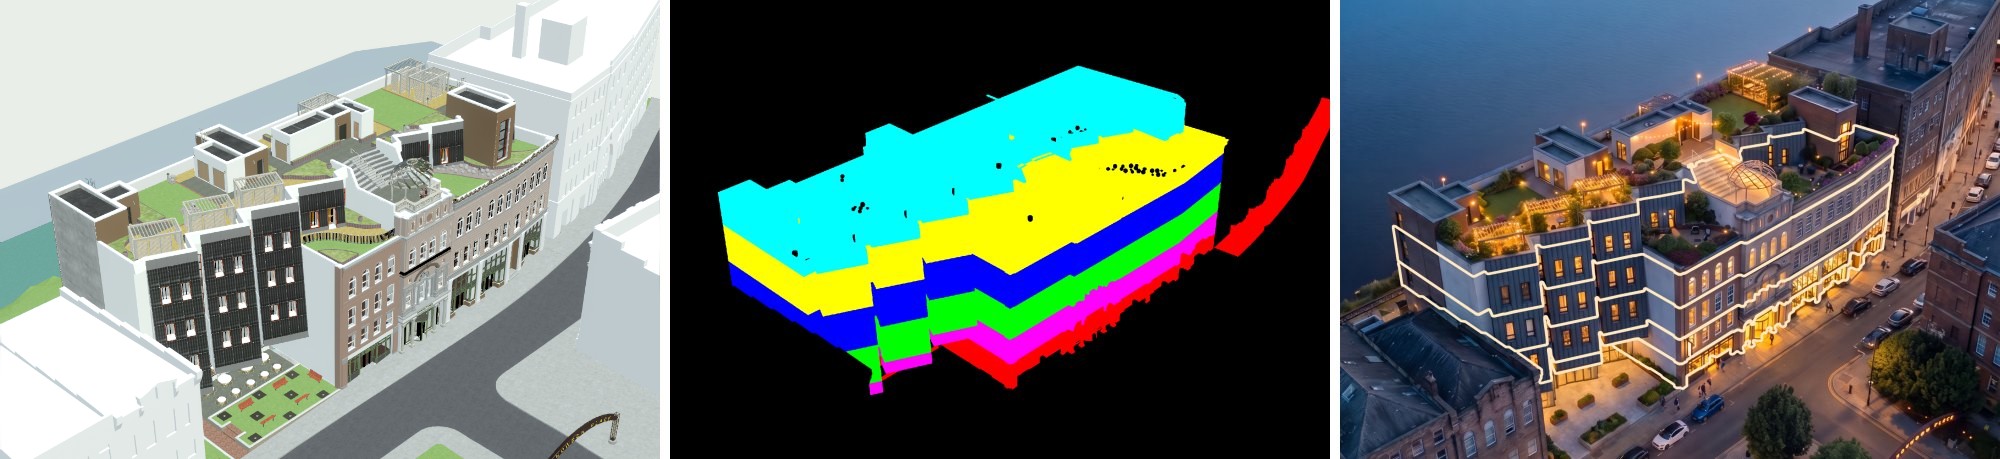
The photo step keeps the camera and every window where they are, so the outlines still fit. Trees are hidden in the colour copy, so nothing in front covers the ground floor.
AI can still change small things in the photos and videos, so check that each outline sits on its floor before you send the page.
6. Sending it
The page comes back as an artifact. Share it as a link from its Share menu, or download it. Anyone with the link can open it, so check with the client first when the homes are not on sale yet.
I hope this one helped, even a little. If it did, the skills and the handbook will help a lot more: the Revit jobs that come back every day, done with Claude, in the model that is already open. Only what I have run myself and found useful on real projects goes in.
David