An exploded axonometric from your Revit model
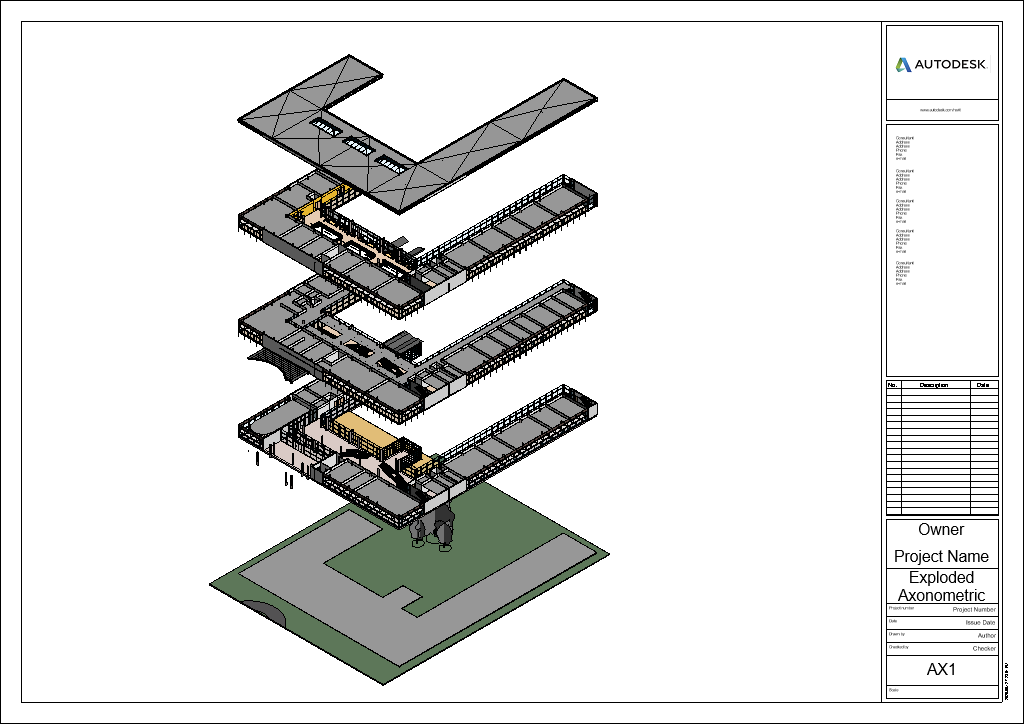
A section box per level, a 3D view each, stacked on one sheet. One prompt instead of an afternoon of clicking.
Shown on rac_advanced_sample_project · Revit 2025 · Claude with the Revit MCP server
1. Connect Revit
The prompt runs through the Revit MCP server, which lets the assistant read the open model and run code inside it. Already set up? Open a project and check localhost:48884/revit_mcp/status/ says healthy.
▸Not set up yet? The one-time installopen
This part needs a terminal and your config file, so use a coding assistant rather than a chat window. Claude Code works, and so does any agent that can run commands on your machine. Install pyRevit first, then paste this in.
Install the Revit MCP server from
https://github.com/mcp-servers-for-revit/mcp-server-for-revit-python
for use with Claude Desktop on Windows. Specifically:

1. Clone the repo into %APPDATA%\pyRevit\Extensions, renaming the
   folder to end in ".extension" (per the repo's manual
   installation instructions).
2. Install uv if it isn't already on PATH.
3. Find my claude_desktop_config.json and add a "Revit Connector"
   entry to mcpServers, pointing at the main.py inside the cloned
   repo, using uv to run it (see the repo README's "Connecting to
   Claude Desktop" section for the exact JSON shape).
4. Tell me when it's done and what I still need to do manually
   inside Revit (enabling pyRevit Routes, adding the extension as
   a Custom Extension, and restarting Claude Desktop). Those steps
   need the Revit and Claude Desktop UI, so don't try to automate
   them.
Three things are left, because they live in a UI:
- 1.Revit → pyRevit →
Settings: turn Routes on, add the cloned folder under Custom Extensions, restart Revit. - 2.Quit Claude Desktop completely and reopen it.
- 3.Open a project and visit
localhost:48884/revit_mcp/status/. It should sayhealthy, with your model as thedocument_title.
2. One prompt
With the server connected, open your model in Revit, open the Claude or ChatGPT desktop app, and paste this in.
Build an exploded axonometric of the open Revit model, on a
sheet. Ask me each question one at a time and wait for my answer.

1. Read the levels. Tell me what you found and propose a split:
   one view per occupied storey, the roof and anything above it
   capped into one, and a bottom view of the site with the
   building hidden. Ask me to confirm or change it.

2. Ask which title block to use, and whether to reuse a sheet or
   make a new one.

Then build it:
- one 3D view per slice, cut with a section box from just below
  that level to just below the next, so each view carries its own
  slab
- make each view with View3D.CreateIsometric, never by
  duplicating, and use a ViewFamilyType whose DefaultTemplateId
  is -1
- take the section box XY from built elements only (walls,
  floors, roofs, stairs, curtain panels), never from topography
- give every view the same camera
- crop with ONE shared X range across all views, Y worked out per
  view
- place the views on the sheet, measure the viewport heights,
  then work out the scale that fits the sheet. Overlap each pair
  until the storeys sit close without covering each other
- place the site viewport first and the roof last

Tell me the scale and overlap you ended up with, then ask whether
to add the graphics. If I say yes:
- a pale base tone on every view, a shade darker for roofs, grey
  for topography and planting
- view filters for the colour: one light tint, varied by category
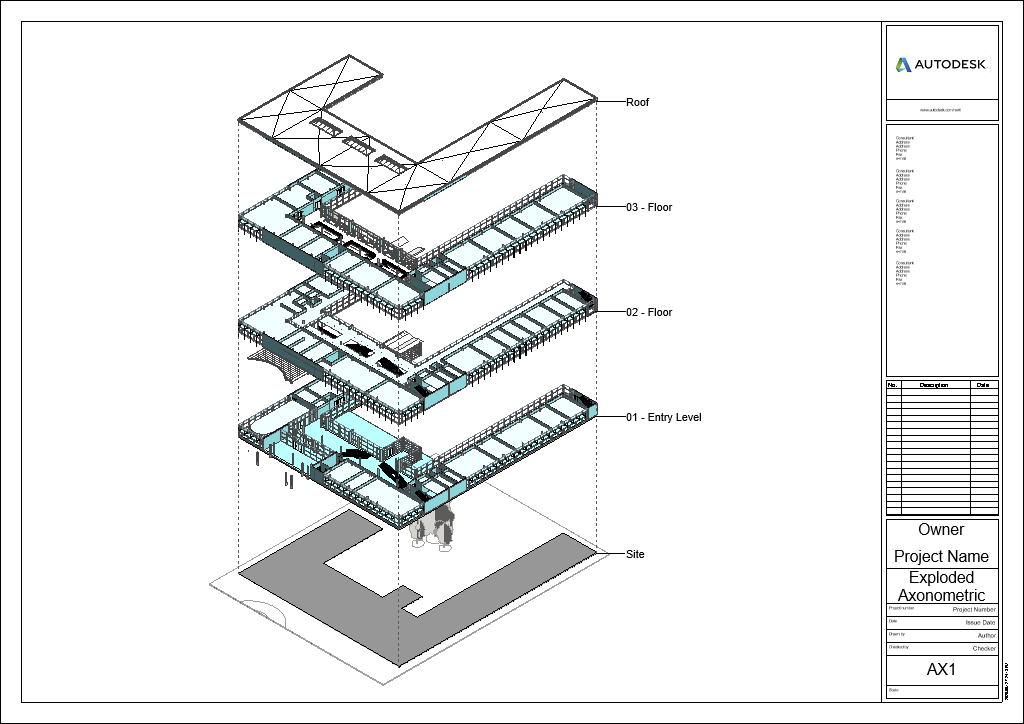
- dashed vertical lines through the building's left and right
  edges, taken from wall location-curve endpoints, each running
  from that corner in the top view to the same corner in the
  bottom view
- a short leader off each storey with the level name at the end

Work in the model's own units and never hard-code a dimension you
could measure.
3. What comes back
First the views and the sheet, in default materials, so you can check the split before anything is styled.
Then the colour, the lines and the labels, on the same sheet.
4. Where this goes
On repetitive, manual Revit work like this drawing, AI can do more than I expected.
If you use Revit every day, it helps to pick one task you repeat often and that takes longer than it should. If you can explain it to someone in a paragraph, you can probably prompt it.
These models keep getting better at reading a model and seeing where the work piles up, so more of that list will come within reach over time.